Health Blog
Health Blog

4 recipes for nutritious winter drinks to boost the immune system
A warm herbal drink is perfect for early mornings or as a “pick-me-up” in the afternoon. Ingredients 5 dl Tulsi tea 1 dl oat or almond milk 1 capsule Ashwagandha, open the capsule and pour in. 1/2 tsp turmeric Honey for sweetening Instructions Heat the tea and milk, then blend all ingredients in a blender until you get a frothy drink. Green Queen, 2-3 servings A green drink with fruit works well as both breakfast and a snack. Ingredients 2 dl fresh spinach and/or baby kale 3 dl almond or oat milk 3 dl chopped mango, kiwi, and pineapple 2 cm peeled fresh ginger Juice of half a lemon 2 tsp green powder or 2 droppers of moringa extract Instructions Blend all ingredients in a blender until you get a smooth drink. Mint Surprise, 1 serving An invigorating green drink that works as a snack or after exercise. Ingredients 1 scoop plant-based vanilla protein 1 tsp AFA powder 1/4 avocado 1 tbsp chia seeds Juice of a whole lemon 1/2 cucumber in pieces A handful of fresh or 1 tbsp frozen mint leaves 3.5 dl oat or almond milk Instructions Blend all ingredients in a blender until you get a smooth drink. Superberry Boost, 1 serving A warm berry drink is perfect for mornings or as a snack. Ingredients 2 dl fresh or frozen berries; e.g. raspberries, blueberries, and/or blackberries 2 bananas 1 dropper tulsi extract 2 dl boiled water Instructions Blend all ingredients in a blender until you get a frothy drink.
Read more
5 healthy Christmas bakes that are vegan & gluten-free
Today I’m sharing my top five Christmas recipes for holiday sweets and baked goods. I aim to maximize the nutrition in everything I make, including treats. Plus, all the recipes are dairy-free, gluten-free, and vegan. Most are also raw. Since December 6th is Finland’s National Day, we’ll start the recipe collection with blue-white bounty! 1. Raw Finland Bounty Ingredients 200 g raw chocolate (or your favorite chocolate) 2.5 dl coconut cream 50 g coconut oil 5 dl shredded coconut 1 tsp vanilla powder 2 tbsp sweetener (to taste) blue spirulina Instructions Melt the coconut cream and coconut oil together in a saucepan. Blend with the dry ingredients until you can shape the mixture into a ball. Remove half and blend the rest with blue spirulina. Take some of both the white and blue filling and form into balls. Place in the freezer. Melt the chocolate in a saucepan and let it cool slightly. Take out the coconut balls and dip them in the chocolate. Put back in the freezer and repeat if you want a thicker chocolate coating. Store in a cool place. 2. Raw Peanut Chocolate Ingredients 2 dl coconut oil 2 dl cocoa powder 2 tbsp honey or agave syrup 1 tsp cinnamon 1/1 tsp salt 2 dl peanuts 2 dl raisins 2 dl goji berries peanut butter Instructions Melt the coconut oil with cocoa powder, honey, cinnamon, and salt. Put a tablespoon at the bottom of about 15 small silicone molds and place in the fridge. Stir the nuts and dried berries into the remaining chocolate mixture. Take out the molds and add a teaspoon of peanut butter on each. On top, add a tablespoon of the remaining chocolate mixture with nuts and berries over the peanut butter dollop. Return to the fridge to set. Enjoy! Store in the fridge and take out just before eating. 3. Raw Iced Chocolate with Goji Berries Ingredients 100 grams coconut oil 100 grams raw dark chocolate 1 pinch sea salt 1 pinch vanilla powder goji berries Instructions: Melt everything except the goji berries in a double boiler. Pour into molds and place in the fridge. Decorate with goji berries. Store in the fridge. 4. Christmas Balls with Licorice and Ginger Ingredients 2 dl shredded coconut 5 medjool dates 1 tbsp coconut oil 2 tsp licorice powder 2 tsp ginger 1 pinch salt Licorice powder for rolling the balls Instructions: Remove the pits from the dates. Blend all ingredients in a food processor. (Add more dates if it doesn’t come together.) Roll into small balls and roll in licorice powder. Store in the fridge. 5. Gluten-Free, Vegan Saffron Buns Ingredients 6 dl organic oat flour 3 dl organic rice flour 1 dl psyllium husk/fiber husk 1 tsp salt 1 dl coconut oil 1 g saffron 7 dl oat milk 25 g yeast 1 dl honey or agave syrup 1 tbsp coconut oil about 60 raisins or goji berries 1 tbsp honey or agave syrup 1 tbsp oat milk Instructions Mix the flours, psyllium husk, and salt in a bowl. Melt the coconut oil in a saucepan together with saffron, oat milk, and agave, and let it reach 37 degrees Celsius. Pour the liquid into a larger bowl. Crumble in the yeast and stir until dissolved. Add the flour gradually and stir until the dough is smooth. It should be a bit loose. Let rise under a cloth for half an hour. Preferably in a warm spot. The risen dough does not need kneading. Divide it into about 24-30 pieces so each piece is roughly half a deciliter. Melt a little coconut oil in a bowl and shape the saffron buns with oiled hands. (Do not add more flour even if they seem a bit sticky.) Place them on baking paper on a tray, press in the goji berries, and let rise for an hour under a cloth. Preferably in a warm spot. Preheat the oven to 200 degrees Celsius. Mix a little honey and oat milk and brush the buns just before baking. Bake for about 18 minutes until beautifully golden brown. Let cool on a rack under a cloth.
Read more
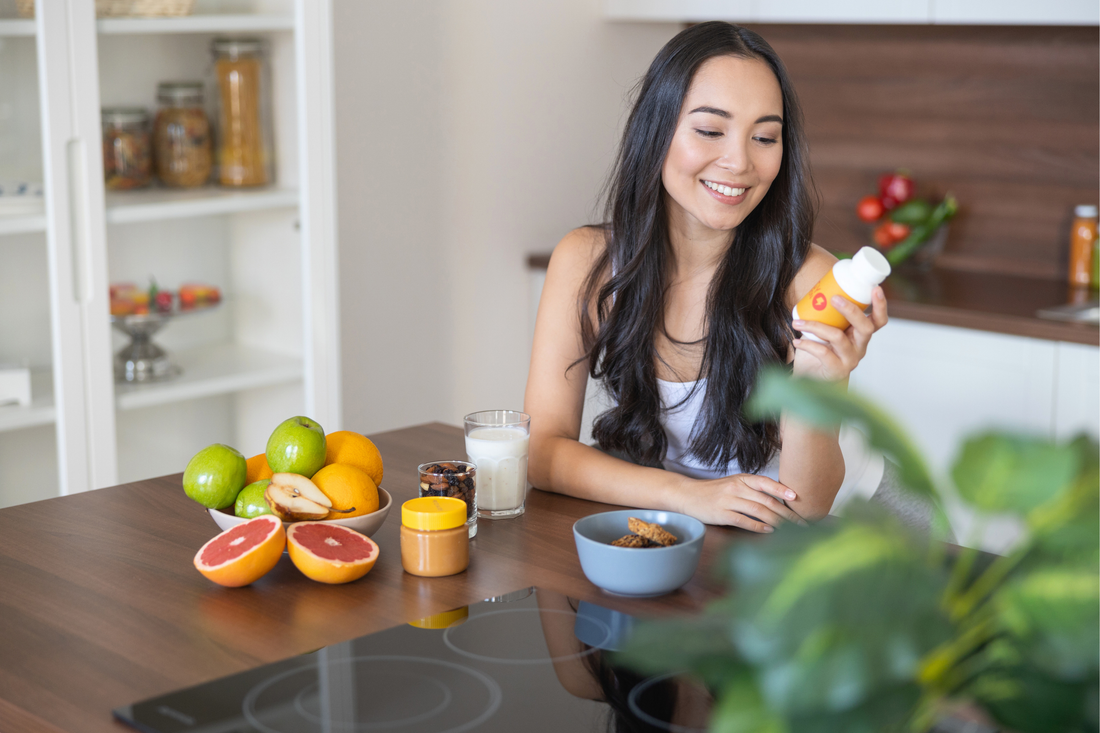
Plant-based protein - Are you getting enough?
We like the term “plant-based food.” It hasn’t yet been burdened with as many ideas as is common in the diet jungle. At Glimja, we eat 95% plant-based food. A common question we get is:“Can you eat plant-based and get enough protein?” Yes, absolutely, if you eat a varied diet and choose well! Proteins consist of amino acids that act as “building blocks” in the body. Our skin, muscles, tendons, cartilage, even hair and nails, are largely made of protein. Protein helps form enzymes, hormones, antibodies, and new tissues. Protein replaces old cells with new ones and transports important nutrients in and out of these cells. The human body can produce all but nine of the 22 amino acids that make up proteins. These nine amino acids are called “essential” amino acids, and we get them from what we eat. Good sources of plant-based protein There are plenty of plant-based foods that contain protein of the highest quality: sprouts of all kinds broccoli spinach buckwheat chia seeds quinoa tofu tempeh chlorella spirulina cabbage green leaves maca flax seeds beans sunflower seeds pumpkin seeds chickpeas almonds nuts nut milk peas lentils teff hemp seeds plant-based protein powders Eat foods from nature Just because someone is vegan, vegetarian, or an omnivore, it doesn’t automatically make them healthy. Becoming vegan or vegetarian can sometimes mean replacing meat with processed soy meat or overconsumption of gluten and carbohydrates. And that’s not good either. If you want to eat fish or meat, grass-fed or wild-caught is recommended, and to eat it no more than 1-2 times a week. Eating animal protein every day or multiple times a day is, in our opinion, not the best for health or the environment. Focus on nutrient-rich, whole foods from nature. Then you can’t go wrong. Health comes from consuming natural food in varied forms of high quality. It’s that simple. Recipe for a plant-based protein shake If you need to get more protein, you can try this protein shake as a snack or after training. 3-4 dl nut milk/oat milk/hemp milk or another liquid you prefer 1 tsp chaga extract powder* 1 scoop plant-based protein powder 1 dl frozen or fresh berries to taste and season 1 organic banana (sweet) or 1 green organic apple (sour) 1 pinch of real vanilla powder *The chaga is of course optional; we added it to provide an adaptogen. If you want, you can instead add, for example, ashwagandha, goji tincture, ginseng, AFA algae, reishi, cordyceps, maca, or holy basil depending on what support you need. Feel free to read more under our adaptogens category.
Read more
Taoist Herbal Medicine: The Three Treasures for Balance
In ancient China, they had a different system for health and medical care than we have today. A doctor was paid to keep their clients healthy. If someone became ill, the doctor received no payment until the patient recovered. The interesting aspect of this system is the perspective on the role of medicine in society and the deep knowledge of what affects our ability to stay healthy for a long time. Of course, the ancient Chinese did not have access to the scientific sophistication available today, but had to rely on their proven experience and observations. In our view, however, there is still a lot we can learn from the Eastern medical tradition, especially because: This testing of experience has been ongoing for at least 3,000 years in Asia. That is a bit longer than the just over 200 years we have had modern scientific medicine in the West. Perhaps the Chinese learned something worth taking a closer look at? Especially in Asia, research has begun on this ancient knowledge and more and more fascinating parallels are being discovered between “ancient wisdom” and actually measurable effects of Chinese herbal medicine. Many of these herbs have now started to be used as complements and/or alternatives within modern medicine in countries including China and Japan. Our own experience is that these herbs can be a key to elevating health to new levels in connection with the right diet, exercise, and rest. We at Glimja have personally experienced this and hope that more people can benefit from the treasure of knowledge found in these preparations. The Three Treasures in Taoist Herbal Medicine Within Taoism and Chinese medicine, they talk about “The Three Treasures.” “The Three Treasures” is a perspective that can simplify the understanding of humans and make it easier for us to see where we need extra support to achieve what we want in life. The ultimate goal of this knowledge is to let our joy of life shine through and to live a long life to the benefit of ourselves and others. The Three Treasures are: Jing Our generative capacity; our deepest reserve of energy that functions as our “battery.” Jing is considered to be located in the kidneys/adrenals and closely linked to our ability to recover and resist stress. Jing is generated when we sleep, rest, spend time in nature, and through specific herbs. Jing is then consumed when we exert ourselves physically and mentally and can be disturbed by prolonged stress without recovery, i.e., leading to “burnout,” or as the Chinese would say; Jing deficiency. In Western medicine, Jing could be related to the hormonal system. Qi Our life energy that we use in our daily lives. Qi flows through the blood throughout the body and is nourished by nutritious food, unobstructed breathing, movement, and closeness in relationships. Qi is disturbed, among other things, by too much sitting still, wrong food or poor digestion, as well as breathing problems. In Western medicine, Qi could be related to oxygenation capacity and circulation. Shen What we see when we say someone “shines in the eyes.” It is our true essence which, according to the Chinese, resides in the heart. When Jing and Qi are in balance, Shen can “find home” and shine with its wisdom, calm, and inspiration. Shen is nourished through meditation, having space for creativity and inspiration, spending time in nature, and can be supported by certain herbs. Shen is disturbed by too many impressions, stress, conflicts, and an unbalanced emotional life. In Western medicine, Shen could be related to our nervous system. Herbs for the Three Treasures The herbal medicine that we at Glimja are most interested in is the herbs that, according to Taoists, support “The Three Treasures.” These are often called “Superior herbs” or “Tonic herbs” because they are believed to increase our chances of a long, balanced, and happy life; simply our ability to let “Shen” shine through. Dragon Herbs offers excellent supplements and teas that reflect this philosophy.
Read more
5 Fat-Free & Vegan Easter Recipes Without Gluten
Sometimes it can be difficult to find fun, tasty and healthy recipes for holidays like Easter. Here are five recipes that we hope will inspire you to enjoy a delightful and healthy Easter! Gratinated Mashed Potato Halves Baked potatoes with an extra twist. A wonderful and beautiful “comfort food” that everyone loves. Ingredients 10-15 small potatoes1 tbsp lemon juice2 tbsp tahini1/2 tsp paprika1 tsp turmeric1 tsp maple syrup1 garlic clove, finely chopped1-3 tbsp unsweetened almond milk or light coconut milk as neededSea salt, to tasteBlack pepper, to taste For topping:1 tsp paprika powderSmall handful of chopped chives1 tsp black Himalayan salt (optional) Instructions Preheat the oven to 180°C. Line a baking sheet with parchment paper. 2. Cut the potatoes in half and place them on the baking sheet with the cut side up. Sprinkle with sea salt and black pepper. Bake in the oven for 45-50 minutes until soft. 3. Remove the potatoes from the oven and let cool for 10-15 minutes until cool enough to handle. Then scoop out the inside of the potatoes with a teaspoon or ice cream scoop, leaving some space at the edges. 4. Place the scooped-out potato in a bowl and add lemon juice, garlic, tahini, turmeric, paprika, maple syrup, salt, and pepper. Mash into a smooth mash – add a little almond milk if needed. 5. Put the mixture into a piping bag fitted with a star nozzle and pipe it decoratively into the potato halves. Garnish with paprika, chives, and black salt. Serve immediately. Zucchini Hummus Perfect for dipping vegetable sticks, using as a topping in wraps, or as a dip for boiled Jerusalem artichoke! Ingredients 5 dl raw zucchini, peeled and chopped1 garlic clove, finely chopped or pressed1 tsp cumin2 tbsp lemon juice1 dl tahini Optional: red chili flakes, sprig of fresh dill, basil or coriander, sea salt Optional wrap: romaine lettuce, tomato, sprouts, and spring onions Optional vegetables: chopped cucumber, cauliflower, broccoli, asparagus, sweet potato, bell pepper, etc. Instructions 1. Blend zucchini, garlic, cumin, lemon juice, and tahini in a food processor until very creamy. 2. Taste and add optional red chili flakes, dill, basil, or coriander if desired. You can also add sea salt if you like. Serve with raw vegetables as a dip. Alternatively, place in romaine lettuce and top with tomato, sprouts, and spring onion for delicious “tacos.” Roasted Asparagus A recipe created by Tina Redder. Ingredients 500g frozen asparagus2 garlic cloves, pressed1 lemon, thinly sliced2 tbsp freshly squeezed lemon juice1/2 tsp sea salt1/4 tsp ground black pepper Instructions Preheat the oven to 190°C and line a baking tray with parchment paper. Place asparagus, freshly squeezed lemon juice, sea salt, black pepper, and garlic in a bowl and mix well. Spread the asparagus on the baking tray in a single layer, preferably with some space between them. Place in the oven and roast for about 10 minutes or until the asparagus is tender in the middle when pierced with a fork. Serve with fresh lemon slices. Citrus & Spinach Salad The simplest salad ever is this combination of spinach & citrus. The vitamin C in the oranges and grapefruit increases the absorption of iron from the spinach. Instructions Cut the orange and grapefruit into pieces and mix with fresh spinach leaves. Garnish with lemon juice. Done! Maple/Date Fudge A wonderful dessert that will be appreciated by all ages! Ingredients 3.5 dl pitted dates0.6 dl maple syrup0.8 dl smooth almond butter1 tsp vanilla powder1/2 tsp cinnamon (optional)1/4 tsp cardamom (optional) Instructions 1. Place dates, maple syrup, almond butter, vanilla, and spices (if using) in a food processor. Blend for 2-3 minutes until the mixture forms a lump. 2. Line a baking pan about 15 cm long and wide with parchment paper. Press the dough with a wet spatula until it covers the pan in an even layer. Cover and place in the freezer for 2 hours or overnight. 3. Remove from the freezer and cut into squares. Best served cold and stored in the freezer. HAPPY EASTER from all of us to all of you!
Read more
Make your own organic raw chocolate with health benefits
Chocolate, chocolate. Many of us love chocolate. Consuming chocolate can give an inner feeling of well-being, security, and a rush of happiness while also providing a taste sensation. There is a connection between eating chocolate and feeling happiness Many say they become happy and feel secure when eating chocolate, what could this be due to? Perhaps this: Theobromine, which naturally occurs in cocoa, is a stimulant that dilates blood vessels in the same way caffeine affects the body. Cocoa is said to make the brain produce more of a molecule called anandamide, which may explain the euphoric feeling some experience when eating chocolate. Anandamide is also produced in the body during exercise. Phenylethylamine (PEA) is a chemical that increases feelings of love, focus, and attention. PEA is noticeably abundant in the brains of happy people, and when we are in love, our PEA levels rise. Dark cocoa has been shown to provide some PEA (also found in blue-green algae). This is likely why chocolate and falling in love are often linked. The amino acid tryptophan naturally occurs in cocoa. Tryptophan is essential for the production of the neurotransmitter serotonin. Serotonin increases well-being and relaxation. What is the difference between cocoa powder, cocoa mass, and cocoa butter? Cocoa beans grow on the tropical tree Theobroma cacao. The tree’s large seeds are the source of chocolate in its many forms. Raw cocoa is rich in antioxidants and also high in magnesium, calcium, zinc, and iron. Cocoa mass is the whole cocoa bean ground into a homogeneous mass. That’s why it is brown and has a very intense cocoa flavor. It produces a dark, rich chocolate. Cocoa nibs are also whole cocoa beans that have been crushed. Cocoa powder is made by removing cocoa butter (fat) from the cocoa beans. This process leaves a powder with a slightly bitter taste that is rich in fiber, antioxidants, and other nutrients. The powder tastes similar to dark chocolate. Cocoa butter is only the fat separated from the cocoa bean. It is white in color and has a mild, quite distinctive flavor similar to white chocolate but without sugar. Why not try making raw, organic chocolate at home with your own ingredients? Making your own chocolate is both simple and satisfying as you can experiment with texture and flavors yourself. Here we share a basic recipe you can use to make chocolate eggs, pralines, chocolate bars, etc. Chocolate Recipe Ingredients: 2.5 dl cocoa butter 2.5 dl cocoa mass or 2.5 dl cocoa powder. 2-3 tbsp honey, agave syrup, coconut sugar, yacon syrup, or another sweetener of your choice. Flavoring: Fill the chocolate with what you love most. Coconut flakes, blueberries, raspberries, chopped nuts, a pinch of sea salt, puffed quinoa, goji berries, spirulina, licorice powder, chaga, lucuma, maca, mesquite, baobab, vanilla powder, cardamom, cinnamon, mint flavor, pink pepper, etc. Instructions: Place the cocoa butter in a stainless steel bowl over a pot of simmering water. Let the butter slowly melt while stirring. Also place the cocoa mass in a stainless steel bowl over a pot of simmering water. Let the mass slowly melt while stirring. Cocoa butter and cocoa mass need to be melted separately. Then mix them together in a bowl and add the sweetener as well as cocoa powder if you are using it instead of cocoa mass. Stir thoroughly. You can now add your flavorings and other tasty ingredients. Place a chocolate mold (preferably silicone) on a tray, pour the chocolate mixture into the mold; this can get messy and requires patience. Panduro has many very nice silicone molds, including one shaped like eggs. If you don’t have a mold, you can spread the chocolate on baking paper. Carefully place in the freezer and let set for 15-30 minutes, or until completely firm. If you want to fill your chocolate eggs or pralines, put some chocolate batter at the bottom of the mold cavity, add the filling, and cover with chocolate batter. Silicone molds make it very easy to release the chocolate when it’s ready. Then just enjoy. If you don’t want to make your own chocolate, we offer the wonderfully delicious organic chocolate from Wermlands Choklad, which is handmade in Värmland.
Read more
5 benefits of sprouts: Nutritious food you can easily grow at home
During my childhood in the 70s, sprouts were a symbol of hippie health food, but today we all understand they are very nutritious and you can find them in most grocery stores. And they taste so good! Here we list 5 reasons why we should all sprout. 1. Fresh and nutritious Sprouting transforms seeds into superfoods! Sprouts are living food and among the freshest and most nutritious we can eat. Sprouting makes seeds, beans, and lentils more alkaline and increases their nutrient density. By eating them, we get vitamins, minerals, amino acids, and many enzymes that support digestion. When you make your own sprouts, you guarantee absolute freshness and maximum living energy. Recently, broccoli sprouts have received a lot of attention due to the plant's high levels of sulforaphane, a powerful phytochemical substance. 2. Easier to digest Sprouting makes them easier to digest and allows our bodies to access the full nutritional profile. A major benefit of sprouting is that it releases beneficial enzymes. These enzymes make all types of grains, seeds, and beans easier for the digestive system. Soaking "awakens" the dormant seed. It releases and reduces enzyme inhibitors and acids. The seeds become easier to digest and the pH level increases, all to our advantage. Depending on the seed being sprouted, proteins in the form of amino acids can also become more concentrated and absorbable. 3. Removes antinutrients One of the biggest benefits is that sprouting helps reduce the presence of antinutrients. Antinutrients are naturally occurring compounds found in plant seeds that interfere with our ability to digest the vitamins and minerals in the plants. Why do natural antinutrients exist in plant seeds? Antinutrients have a protective function in plants. They help plants survive by deterring pests and insects. Antinutrients also serve to prevent a seed from sprouting until it is mature enough and ready to grow. One of the best-known antinutrients found in grains, beans, nuts, and seeds is called phytic acid. 4. Affordable You get a lot of sprouts for your money. 5. Fun It's very fun to sprout in your own kitchen, all year round. It's fascinating to watch how a small amount of seeds turns into a whole jar of fresh sprouts we can enjoy. There are many types of sprouting seeds to choose from, such as alfalfa, radish, mung beans, green lentils, black lentils, fenugreek, clover, red cabbage, beetroot, broccoli, quinoa, sunflower shoots, chickpeas, buckwheat, and more, so there's no risk of getting tired of the taste. It’s always good to alternate between different types of sprouts. Sprouting guide How to sprout at home Always clean the seeds before sprouting using a sieve. The better you clean, the nicer the final sprouts. Then soak the seeds. The soaking time varies from seed to seed. It’s usually stated on the back of the package. Most often soaking is 12 hours. After soaking, pour off the water. Repeat rinsing 1-2 times. Now place the seeds in a sprouting jar, sprouting tower, or sprouting bag. Place the sprouting container in a warm (18-22 degrees Celsius), bright spot but not in direct sunlight. Shake the shoots regularly to separate them. Prevent too much water and moisture buildup. Rinse the sprouts twice a day. Gently swirl the jar or stir the sprouts daily. When they’re ready, you’ll see a little tail on the sprout. Voila, life is sprouting! Place them in a bright window for a day and they’ll turn beautifully green. Finished sprouts should be stored dry in the fridge and last 2–3 days. You can keep the filled sprouting jar in the fridge. Note: some sprouts are covered with fibrils (tiny root hairs) that look like white fuzz; this means they are thriving, not mold. Mold is grayish and smells bad. How should you eat sprouts? Sprouts are delicious raw in a salad, in a wrap, chopped over a sandwich, or blended in a smoothie. Or they can be used in cooking, for example sautéed with vegetables, added to a stew, in veggie patties, in bread, or granola. It all depends on the sprout, flavor, and your eating habits. What is the difference between soaking and sprouting? Soaking The whole seed/food is soaked in liquid for a certain time, often in salted water. When soaking nuts, it’s often called “activating” the nuts. After that, sprouting allows the soaked food to grow further. In other words, you must soak something first before you can sprout it. Sprouting This is when the whole seed sprouts or germinates. Sprouting happens after soaking and further improves the food’s digestibility and gives a nicer flavor. After sprouting, it can be dried and ground into powder if desired. Something to think about Whether you want to sprout or not, rice, legumes, seeds, nuts, grains, and others like buckwheat and quinoa should always be soaked overnight before drying or cooking. It makes it easier to digest, removes the phytic acid, and tastes so much better! Hummus made from soaked chickpeas is a completely different taste experience than from unsoaked chickpeas. Hummus made from soaked, sprouted, and then cooked chickpeas takes it even further! Give it a try! Soaking and sprouting Below is an idea of how long different foods can be soaked and whether they can be sprouted. Sprouting seeds The package states how long they should be soaked and the approximate sprouting time. Seeds Pumpkin seeds: 8 hours soaking, 1-2 days for sprouting. Sesame seeds: 8 hours soaking, 1-2 days for sprouting. Sunflower seeds: 8 hours soaking, 2-3 days for sprouting. Flax, chia, and hemp seeds are harder to sprout. However, you can sprout these small seeds by using a shallow bowl and less water. These seeds absorb water and develop a gel-like texture during the sprouting process. This is normal and results in sprouts within a few days. Nuts (Activation) Almonds: Need at least 2 to 12 hours soaking. Sprout in about 2-3 days. Walnuts: 4 hours soaking, these do not sprout. Brazil nuts: 3 hours soaking, these do not sprout. Cashews: 2-3 hours soaking, these do not sprout. Hazelnuts: 8 hours soaking, these do not sprout. Macadamia nuts: 2 hours soaking, these do not sprout. Pecans: 6 hours soaking, these do not sprout. Pistachios: 8 hours soaking, these do not sprout. Beans and legumes Chickpeas: 8-12 hours soaking, 2-3 days for sprouting. Lentils: 8 hours soaking, 2-3 days for sprouting. Adzuki beans: 8 hours soaking, 2-3 days for sprouting. Black beans: 8-12 hours soaking, 3 days for sprouting. White beans: 8 hours soaking, 2-3 days for sprouting. Mung beans: 24 hours soaking, 2-5 days for sprouting. Kidney beans: 8-12 hours soaking, 5-7 days for sprouting. Navy beans: 9-12 hours soaking, 2-3 days for sprouting. Peas: 1: 9-12 hours soaking, 2-3 days for sprouting. Grains Buckwheat: 8 hours soaking, 2-3 days for sprouting. Amaranth: 8 hours soaking, 1-3 days for sprouting. Kamut: 7 hours soaking, 2-3 days for sprouting. Millet: 8 hours soaking, 2-3 days for sprouting. Oat flakes: 6 hours soaking, 2-3 days for sprouting. Quinoa: 4 hours soaking, 1-3 days for sprouting. Wheat berries: 7 hours soaking, 3-4 days for sprouting. Wild rice: 9 hours soaking, 3-5 days for sprouting. Black rice: 9 hours soaking, 3-5 days for sprouting. Here you will find sprouting equipment and sprouting seeds. We wish you a thriving day!
Read more
Gentle detox for the whole family - 7 mild methods
Spring flowers are peeking out and the sun is shining gently. In spring, we long to clean up. We want to tidy the home, declutter, wash curtains, clean windows, and do other things to clear out the winter. We often also feel drawn to “cleanse the body” with green smoothies, outdoor exercise, and good nutrition. In this article, we share how you can do a continuous “cleansing” of your body in a gentle way over a longer period and how we can support children with detox since we often get that question. What is a gentle detox? Does a detox have to be intense and exhausting? No, you can cleanse the body gently over a longer time. That suits many people better. Eventually, it might even become a lifestyle =). Habits we build over time eventually become dependencies. These can be both healthy and less healthy dependencies. But forcing ourselves doesn’t work. We need to be kind to ourselves and create new healthy, strengthening “dependencies” over a longer period. Can children do a detox? That’s a question we’ve been asked many times. The answer is no. But they can detox gently daily through a healthy lifestyle. Of course, this is good for all children but perhaps especially important for children who often get sick, are stressed, have trouble sleeping, have stomach problems, are overweight, or have been vaccinated and reacted negatively. Children detox through the liver and digestive system just like adults by eating healthy food, avoiding junk food, and preventing constipation. Remove foods with artificial colors and preservatives and encourage them to eat colorful vegetables, leafy greens, fruit, berries, and fermented foods like kefir, kimchi, and sauerkraut to support their good microbiome. Children respond quickly and very well to the right diet. Avoid constipation by reminding children to drink plenty of water. If they often get constipated, remove cow’s milk. Milk is for calves, period. Give them good fiber in their food. Most children don’t drink enough water during school days and often don’t want to use school toilets. Talk about how important water is. Make water at home more fun with berries, citrus fruits, and herbs. Avoid juice from concentrate, soda, and sports drinks. Children detox through their lungs by spending time outdoors, just like adults. So get outside, be physically active, and take deep breaths together. Encourage play and running outdoors and do yoga together. 7 tips for a “gentle detox” Here we share tips for a gentle detox for both adults and children; many of these you can do together and make it a fun event, like a spa evening in the bathroom. 1. Bathe in a tub with Epsom salt Add 5 drops of essential lavender oil to your bath with 4 dl of Epsom salt (magnesium sulfate). You can also do this as a foot bath. Even children can take warm, relaxing baths with Epsom salt. Make this part of their bedtime ritual; it often leads to relaxed children who fall asleep well. 2. Body scrub Watch the video below to learn how to make a simple body scrub; you can vary it endlessly by choosing different base oils and essential oils. Sugar can be replaced with natural salt. Even children can gently scrub their skin; make an extra soft scrub for a child with honey. 3. Dry brushing The lymphatic system is one of the body’s most important cleansing systems. It is supported by movement and exercise, massage, and water. But dry brushing every morning before showering is also very good for the lymphatic system. It releases impurities and naturally stimulates the circulatory system while giving smoother, softer, and brighter skin tone. Children can also gently brush their skin with a soft brush. In this article, you will learn more about the method. 4. Clean water When toxins are drawn from the body, they must be flushed out. Full kidney function depends on having enough water in the body. Avoid soda, dairy products, and quick juices and drink clean water instead. Here you can find good water purifiers. 5. Algae, juices & smoothies Fresh juice or smoothies every day in addition to regular meals provide loads of nutrients and vitamins. Try to always include foods like colorful vegetables, sprouts, berries, fruit, garlic, onions, and spices in your daily diet. This works for all ages. Who doesn’t feel good from vegetables?* Chlorella and Spirulina support the body in removing toxins, especially heavy metals, while their nutritional content is easily absorbed. Children can also take spirulina. Chlorella is considered a bit “stronger” and suits adults better. *By vegetables, we don’t mean iceberg lettuce with sliced tomatoes and cucumber. We mean all kinds of vegetables in all colors that can be prepared in thousands of ways. Nowadays, there is so much fun inspiration on the internet and in cookbooks for vegetable recipes. 6. Infrared sauna An infrared sauna supports cell energy, reduces inflammation, improves circulation, enhances oxygen supply in the blood, and supports detoxification. Older children can also sit in an infrared sauna for a while, always under adult supervision to avoid overheating. Older children can try the sauna for 10 minutes at 40-43 degrees Celsius. 7. Supplements Lactic acid bacteria are crucial for restoring gut flora and balancing the immune system. They also help with constipation. It’s so important to be able to go to the bathroom every day. For all ages. Vitamin C has been shown to be amazing in many ways, not least as a powerful antioxidant. Vitamin C helps counteract damage from heavy metals, chemicals, and toxins and supports the immune system. For all ages. Iodine detoxifies and protects the thyroid from harmful halogens like fluoride, chlorine, and bromine. For adults. Enzymes like protease, catalase, nattokinase, serrapeptase, bromelain, and papain are fantastic. They break down unwanted proteins and support recovery when taken between meals. For adults.
Read more
Gluten-free & vegan strawberry cake with coconut oil
Here we share a recipe for a gluten-free shortcrust tart with coconut cream & strawberries. This is a perfect summery cake with wonderful ingredients like strawberries, raw honey, and coconut. A lovely gift for birthdays, breakfast in bed, a coffee break, or dessert! Ingredients For the base:7 dl almond flour2.5 dl tapioca flour1.2 dl unsweetened almond milk2 tsp baking powder4 tbsp coconut oil1 tsp vanilla powder2 tbsp raw honey or maple syrup For the cream:1 can of coconut cream that has been chilled overnight2-3 tbsp honey For the topping:500g strawberries, halved Instructions: Base Preheat the oven to 200°C. Mix almond flour, tapioca flour, and baking powder in a bowl until completely lump-free. Add the coconut oil and massage until it forms even crumbs. Blend almond milk, vanilla, and maple syrup or honey in a blender. Pour the liquid over the crumbly dough and mix until you have a smooth and soft dough. Sprinkle some almond flour on a baking sheet lined with parchment paper and shape 10-15 evenly sized balls from the dough, then flatten them into round cookies on the sheet. They should be about 1 cm thick. Place in the middle of the oven and bake for 12-15 minutes until beautifully golden brown. Then remove and let cool. Cream Place a bowl in the freezer for 10 minutes before you start. Take the coconut cream out of the fridge and scoop out only the thick cream that often settles on top (leave the coconut water behind). Whip the cream in the cold bowl for 2-3 minutes with an electric mixer until you get the right consistency. Add honey and whip for another 2 minutes. Set aside. Cakes You can make one or two layers. Start with one cookie as the base and add a dollop of coconut cream. Decorate with strawberries. Serve this way or build a second layer the same way as before. Then just enjoy!
Read more
15 tips: Coconut oil for skin, hair & dental care
Coconut oil is an absolutely fantastic product that can be used for a variety of purposes. It is beneficial for the skin, economical, and you know exactly what it contains; 1 ingredient completely free of chemicals. Coconut oil is suitable for men, women, children, and babies. Here we give 15 tips on how you can use coconut oil on your body. We offer coconut oil in a glass jar or from Akamuti in a smaller tin that is easy to carry in your handbag. 1. Moisturizer Coconut oil can be applied all over the body as a "lotion." Coconut is good for damaged skin, nourishes all dry areas, and soothes itching and eczema. It is also suitable for sensitive and reactive skin. 2. Eye cream Coconut oil can be used as an eye cream; only a tiny amount is needed to reduce puffiness, bags, and wrinkles. 3. Aftershave Coconut oil helps heal your skin after shaving without clogging pores. 4. Deodorant Coconut oil is an excellent base for deodorant cream. It is even more effective combined with arrowroot powder and/or baking soda. We also have ready-mixed deodorant creams. 5. Treatment for dry scalp Take a tablespoon of coconut oil and work it into your dry scalp. Leave for about 15 minutes. Wash your hair. 6. "Hair gel" Rub a little between your palms and squeeze into your hair; coconut oil gives that "beach look" to short and curly hair. 7. Toothpaste Mix coconut oil and baking soda and put a little on your toothbrush. Brush as usual. 8. Mouthwash Take some coconut oil and keep it in your mouth for about 5 minutes while swishing the oil around. Spit it out into the trash. This is often called "oil pulling." Coconut oil is antibacterial and can help prevent plaque buildup. 9. Makeup remover Take a small dollop of coconut oil on your face and remove makeup. Wipe off with a cotton pad and then wash your face with water and facial toner. 10. Lip balm Rub a little on your lips whenever you want. 11. Massage oil Coconut oil is an excellent massage oil. Take a dollop and massage it wherever you want on yourself or someone else. 12. Lubricant Coconut oil is a completely natural and safe lubricant that does not dry out. 13. Cream for stretch marks Massage into the desired area. Coconut oil helps the skin become more elastic. 14. Body scrub Mix coconut oil with organic raw cane sugar or sea salt and rub around your body in the shower. Rinse off and your skin will be super soft. You can also add other organic oils (e.g., avocado or jojoba oil) as well as essential oils for fragrance. 15. On scrapes and cuts Coconut oil forms a thin layer that protects the wound from dust and bacteria from the outside. Do you have more tips on how to use coconut oil? Share them in a comment or ask a question and we will answer!
Read more
Simple recipes for creamy vegan cashew cheese
Cashew nuts are not only incredibly beautiful to look at when they hang one by one in their “little houses” but also incredibly tasty and appreciated nuts for their mild and creamy flavor. Cashew nuts are a really delicious base for both plant-based yogurt and cheese. When you see how they grow, you understand that they are not cheap.You can of course buy the tastiest cashew nuts from us but also in regular grocery stores. We think it is important to choose organic. This recipe for plant-based cheese is a tasty (as they say here in Gothenburg) accompaniment to most things like salad, vegetables, crackers, or sourdough bread. Cashew Cheese with garlic and dill 3 dl cashew nuts 2 dl water a pot or bag of dill – we think you can never have too much a pinch of black pepper a pinch of sea salt 1 garlic clove or more if you dare How to make it Soak the nuts for about 4-5 hours, drain the water, and blend all ingredients in a powerful blender. Enjoy with any accompaniment, e.g., raw food crackers or freshly baked sourdough bread. You can also make this recipe with probiotics instead, but then the end of the recipe looks different: Cashew Cheese with lemon and black pepper 3 dl cashew nuts 2 dl water 1/2 squeezed organic lemon a pinch of black pepper a pinch of sea salt 2 probiotic capsules How to make it Soak the nuts for about 4-5 hours. Drain the water from the nuts and blend all ingredients in a powerful blender. Put the mixture in a nut milk bag and let it hang over a bowl at room temperature for about 20 hours. It drips, so it’s important to have something underneath. Gently press out the excess liquid. Store in a glass jar in the fridge.This recipe is especially liked by the stomach and is gentle on digestion. Digestion is our absolutely most important function when it comes to long-term health.
Read more
Simple vegan smoothies for the whole family
3 dl cashew milk – 2 dl organic cashew nuts and 0.8 liters of water 1-2 dl red berries, we used frozen strawberries and raspberries 1 date A pinch of vanilla powder Instructions: First, blend the cashews and water in a powerful blender at high speed until it becomes a nut milk. Then add the rest and blend until completely smooth. If you use fresh berries, you may need to add ice cubes at the end to chill the drink. Serve in nice glasses with straws. A tasty, healthy, and filling snack that most people like, even the pickiest little ones. Green juice with apple, spinach & mint 5 deciliters sweetened or unsweetened organic apple juice with pulp 1/2 organic lemon 1 large handful of organic baby spinach 1 handful of fresh mint leaves Instructions: Juice the half lemon and blend all ingredients together in a blender. Taste and add more lemon if you want more acidity or more apple juice for sweetness. Strain the juice if you like, then pour into glasses with ice cubes. Top the glass with a few mint leaves just because it looks nice and tastes great to chew on. These lovely drinks, including thicker smoothies, are perfect to take along on a picnic in our Life Factory bottles, which have a wider opening than many other glass bottles.
Read more