Health Blog
Health Blog

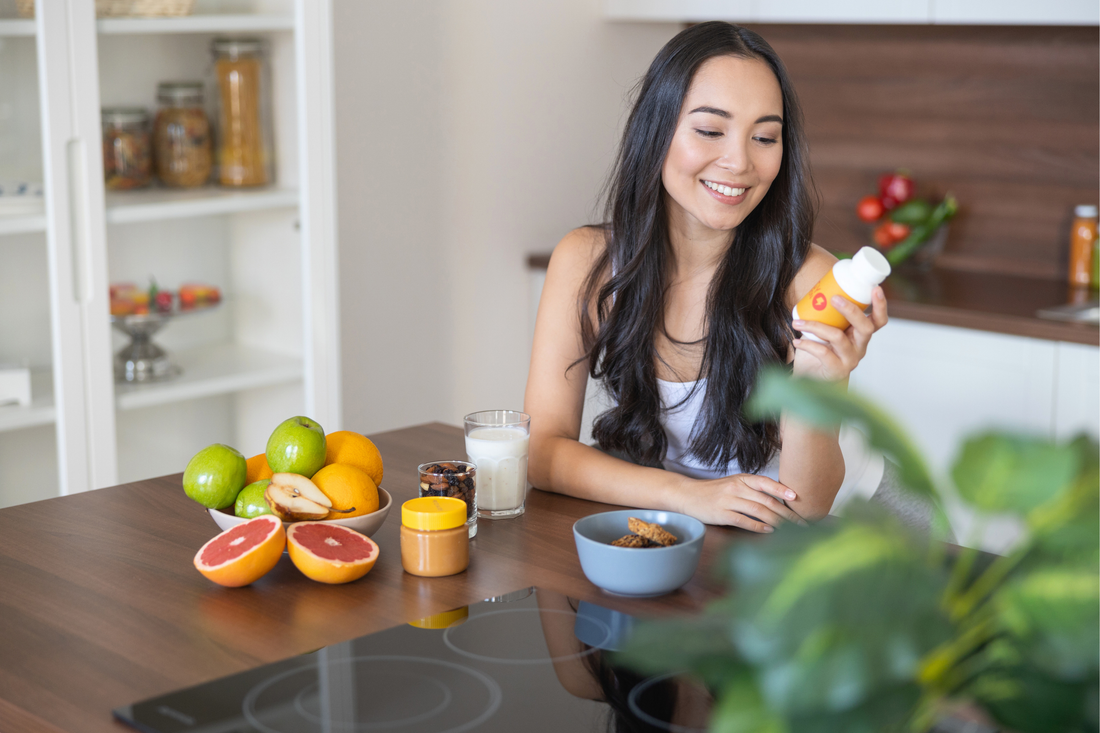
Immune-boosting recipes with simple ingredients
Here are some simple and immune-boosting recipes with fruits and vegetables commonly found in Swedish homes & grocery stores! Perfect when you don’t want or can’t go to the store. Green Vitamin C Boost 2 servings– 1 ripe avocado– 3 ripe kiwis– 1 bag of fresh spinach– Water Cut up the fruit, put everything in a blender, cover with water, and blend until you get a green superdrink! Salad Mix with Simple Dressing 1. Gather the vegetables you have at home and feel like eating. Use a base of some type of green leaves. Sprouts are also an excellent ingredient. Slice the vegetables thinly. Carrots, cabbage, zucchini, fennel, etc., can advantageously be sliced with a cheese slicer or vegetable peeler for a thin and crispy texture. Feel free to add fruit or berries like apple, cranberries, or blueberries if you like a bit of sweetness in your salad. Mix everything in a large bowl. 2. Whisk together a dressing made of olive oil, lemon juice or apple cider vinegar, honey, salt, and herbs – fresh, frozen, or dried. Use whatever you have at home. The key to a good dressing is to include at least three of the five flavors: salty, sour, sweet, bitter & umami. The simple ingredients above achieve this very easily. Let your imagination flow and experiment to find your favorites. Drizzle the dressing over the salad and serve. Simple, tasty & healthy! Oven-Roasted Vegetables the Easy Way This has become a big favorite at our home this winter. It’s simple, delicious, and usually works with whatever you have at home without needing to plan ahead. 1. Gather some vegetables and root vegetables from the fridge and pantry. As a base, it’s good to have something starchy like potatoes, pumpkin, sweet potatoes, or beets. Add vegetables like bell peppers, eggplant, zucchini, onions, tomatoes, fennel, pointed cabbage, or whatever you have at home. Cut everything into suitably sized wedges/pieces. Potatoes need to be boiled beforehand. Most other vegetables do not. 2. Place everything on a large baking sheet. Drizzle with a little oil (coconut oil is probably best for heating from a health perspective) and spices. Some of our favorite spices are garlic, black pepper, herb salt, rosemary, thyme, oregano, tarragon – or why not a really good curry. 3. Bake in the oven at 225°C for 20-40 minutes depending on the type and size of the vegetables. Keep an eye on it and check with a fork if you’re unsure. They’re done when soft in the middle and have a nicely grilled surface. Serve preferably with salad, beans, or hummus!
Read more
Plant-Based & Gluten-Free Strawberry Cake for Midsummer
Are you looking for a delicious recipe for the Midsummer celebration? Then we recommend this wonderful Midsummer cake with almond, coconut, and fresh berries. It is gluten-free and vegan! Ingredients Cake base 4 dl rice or almond milk 1.5 tsp apple cider vinegar (or lemon juice) 0.8 dl unsweetened applesauce 1 tsp vanilla powder 7.5 dl almond flour 2 dl potato starch 0.8 dl cornstarch (or arrowroot) 3 dl raw cane sugar or coconut palm sugar 1.5 tsp baking powder 1-2 pinches natural salt Coconut cream The thick cream from 3 CHILLED (8h) cans of coconut cream/milk (not the liquid in the can) 3-4 tbsp maple syrup (add more to taste) Strawberry cream & garnish 1 1/2 liters fresh strawberries1 tbsp coconut sugar Instructions NOTE! Chill the coconut cream and the bowl for whipping in for at least 8 hours. Preheat the oven to 180°C (356°F). Grease two large round baking pans with coconut oil. Measure the almond or rice milk and add vinegar. Let sit for a few minutes. Then add applesauce and vanilla powder and stir well. Mix all dry ingredients in a large bowl. Then add the liquid and stir until smooth. The batter should be thick but pourable into a cake pan. Divide the batter evenly between your two cake pans and bake in the middle of the oven for 35-40 minutes or until the cakes have a golden brown surface. Let cool for about 15 minutes. Then loosen the cakes from the pans and turn them out onto a baking sheet or plate. Let cool completely. Slice 1/2 liter of strawberries for garnish. Mash 1 liter of strawberries and mix in 1 tbsp coconut sugar. Let sit for 30 minutes. Whip the cold coconut cream with maple syrup until fluffy using an electric mixer or similar. To assemble the cake, place one cake base on a serving plate. Spread the mashed strawberries on top. If you like, you can add a thin layer of coconut cream over the strawberry cream. Then place the second cake base on top and spread the coconut cream over the entire cake – top and sides. Garnish with sliced strawberries and enjoy!
Read more
Refreshing summer smoothies for health and energy
When summer is here, it’s lovely to treat yourself to something nice in the summer heat. Here are some of my favorite recipes. Green smoothie This green smoothie is nutritious and filling, perfect for lunch when it’s warm. 2 avocados 2 large handfuls of spinach 1 small lemon A small piece of ginger 1 apple A pinch of salt Water to get a good consistency Sea buckthorn smoothie The sea buckthorn smoothie is tart and refreshing, great as a light snack. 50 ml raw sea buckthorn juice or sea buckthorn berries 1 banana Water to get a good consistency and not too sour. Honey to taste Purple chocolate nice cream Nice cream is perfect as a nutritious snack. Or why not as a dessert or smoothie? 200 ml frozen blueberries 1 frozen banana 1 tbsp raw cacao 1 tsp maca powder A pinch of salt 50-100 ml coconut or oat milk (Water if you prefer a smoothie) Dip an ice cream scoop in warm water and scoop balls into a bowl. Serve with cacao nibs. Coffee latte This coffee latte is perfect when you crave coffee in the summer heat. Frozen leftover coffee Any milk drink, e.g., oat barista. A splash of any sweetener if needed. Prepare by freezing leftover coffee as ice cubes if you have coffee left after brewing. Serve the frozen cubes with oat milk. Let them melt while you sip a lovely iced latte in the sun. A great way to reduce food waste too! You can also blend the mix in your Omniblend for a cool, creamy version. Ila's super smoothie I usually make this smoothie a few times a week and it makes three servings. 1 frozen banana 100 ml lingonberries 100 ml blueberries 100 ml frozen mango 100 ml red currants 100 ml gooseberries 100 ml any yogurt, e.g., coconut yogurt 100 ml aloe vera spinach 1 tablespoon glutamine 1 tsp MSM powder 1 tsp collagen or protein powder sea salt with seaweed 2 tsp omega-3 oil 1 tsp cinnamon 2 tbsp berry powder 30 mineral drops 1 tsp chlorella 1 tsp spirulina 2 probiotic capsules 2 enzyme capsules 2 tbsp coconut, MCT, or C8 oil Top with coconut cream and hemp seeds, cacao nibs, goji berries, and mulberries or any muesli you like. This smoothie is truly packed with nutrients, perfect when you need a really loaded smoothie, for example after a workout. Choose your favorite berries, frozen or fresh if you have them.
Read more
Seaweed dip with lemon flavor - Nutritious protein from the sea
Dulse seaweed is one of the most nutritious foods on earth, used as food, flavoring, and medicine by people on every continent since ancient times. Dulse in Cooking Dulse is considered one of the most exquisite seaweeds with its salty, slightly smoky flavor, yet also a mild, pleasant taste with a chewy texture. You can use it raw in a salad or add it rinsed or blanched to, for example, a stew, soup, vegetables, or noodles. Of course, we have several favorite recipes with dulse, and here is one created by Andrew Olson “The one ingredient chef” on oneingredientchef.com. He makes delicious recipes based on the belief that food is power, and that with every bite we decide whether that power works for us or against us. Inspiring! This particular dulse recipe works just as well as a spread on a sandwich or as a dip for vegetables. Lemon-Flavored Dulse Dip/Spread Recipe for about 2.5 dl (1 cup) Ingredients:1.2 dl cashew nuts4 tbsp sunflower seeds3 tbsp tahini1 whole lemon (juice + grated zest)1-2 garlic cloves3 tbsp sun-dried tomatoes (dry, without oil)3 tablespoons dulse flakes1 pinch of salt (optional)Water (as needed for consistency) Step One Soak the cashew nuts and sunflower seeds for at least 2 hours in about 7-10 dl (3-4 cups) of water. Also soak the sun-dried tomatoes in boiling water for about 30 minutes. Pour enough water to cover them well. Step Two Drain the water from the nuts/seeds and place them in a food processor with tahini, lemon juice, grated lemon zest, and 1-2 garlic cloves. Pulse in the mixer until everything is broken down and the texture is fairly creamy. Step Three Drain the water from the sun-dried tomatoes and chop them. Then add them to the mixer with dulse flakes, salt (optional), and a little water (as needed) to achieve a spreadable/dippable but not watery consistency. Taste and adjust with more ingredients as needed. Step Four Chill! Like most nut-based recipes, this gets even better after chilling for 2-3 hours. When the ingredients have a chance to rest, the flavors develop. Serve with crackers, bread, carrots, celery, or other tasty snacks!
Read more
Dulse Brownie - The Taste of the Sea in a Luxurious Dessert
I love sea salad, seaweed, saltwater algae. Yes, a beloved child has many names. They are incredibly rich in nutrients and can be used both in cooking and baking. I have even dedicated an entire blog post where I have gathered all my favorites on Morotsliv. Dulse One of these favorites is dulse, or Palmaria palmata in Latin and söl in Icelandic. It is a red algae that stands out quite distinctly from other algae due to both its color and taste. Properties As you may know, algae are very nutrient-rich, and dulse is no exception. Dulse contains a lot of fiber and protein and is rich in vitamins, trace elements, healthy fatty acids, and antioxidants. Dulse is actually said to contain the most iron of all algae and has high levels of iodine and potassium. Dulse contains alginic acid, which can bind heavy metals in the body and acts as a natural detox. Dulse has been shown to be anti-inflammatory, antiviral, and antithrombotic. Dulse has 20–50 centimeter long fern-like leaves with a deep pink or reddish-purple color. It grows on the northern coasts of the Atlantic and Pacific Oceans. It is common that the dulse we can buy here comes from the clean waters of Iceland or the Faroe Islands. Dulse is commonly found from June to September and can be hand-harvested at low tide. Dulse in Cooking It can be used raw, cooked, soaked, or dried. When dried, it has a leathery texture and becomes soft and slippery when soaked. It has a slightly nutty, smoky flavor of salty licorice, violet, umami, a bit of acidity, and a scent of the sea. When we think of seaweed and algae, we often think primarily of Japanese cuisine, but dulse has long been used in cooking in Ireland, Scotland, and France, where it is eaten raw with fish and potatoes. It is used, for example, as a flavoring in ice cream, cream cheese, and bread and can also be bought in tablet form as a dietary supplement. Fresh dulse can be eaten directly before drying, and in Iceland, there is a tradition of eating it with butter. Dulse can be used as vegan bacon if you fry or deep-fry the algae, and it can also be fried into chips or baked in the oven, preferably with cheese on top. It also adds depth to creamy rice dishes like risotto and paella. You can also bake bread with dulse. For example, the Irish “White soda bread” contains dulse. Or make desserts with chocolate or bake a sticky chocolate cake with dulse. Dulse can also be used in soups and salads or as a topping on bread. Finely chopped, the algae works as a flavor enhancer thanks to its rich umami taste. You can sprinkle it on any dish. Preparation Most algae should be soaked before cooking, often for at least 20 minutes, so they swell. Some can swell up to 10 times their dried size. If the algae is too salty or contains sand, it should be rinsed clean with cold water. Red algae, such as dulse, can be boiled whole or chopped into pieces. Fresh or soaked, it keeps for about a week in the refrigerator. Dulse can also be eaten dried, usually as flakes or powder sprinkled on salads or sandwiches. It also works as a flavoring and coloring for butter, soups, hummus, dips, dough, stews, etc. Dried dulse pieces can also be eaten as chips or cocktail snacks. Sticky Chocolate Cake with Dulse As mentioned, dulse can be used both in cooking and baking, and my absolute favorite is probably this sticky chocolate cake with dulse that makes my mouth water just thinking about it. If you choose coconut oil instead of butter, you get a vegan version, and for a gluten-free version, you can use gluten-free flour mix. Recipe: 150 g butter or coconut oil 1.5 dl water 2 tbsp agave, sukrin, or fiber syrup 2 dl granulated sukrin, raw sugar, or other sweetener of choice 3 dl sifted spelt flour or gluten-free flour mix 1 dl raw cocoa powder 0.5 tsp vanilla powder 1-2 tsp dulse flakes 1 pinch sea salt Coconut oil or butter and cocoa powder for the pan. Instructions: Preheat the oven to 175°C. Grease the pan (about 20 cm in diameter) with coconut oil or butter and cocoa powder. Melt the fat with syrup and water. Mix the dry ingredients in a bowl. Combine the dry and wet ingredients. Pour the batter into the pan and bake in the oven for about 30 minutes, depending on how gooey or firm you want it. Let it cool in the refrigerator for a couple of hours before serving. Eat with coconut cream, coconut chips, fresh berries, and decorate with dulse flakes. Good luck!
Read more
Vegan strawberry cake - gluten-free & dairy-free summer party
Enjoy the cake at Midsummer, your birthday, or Saturday fika! The recipe is dairy-free, egg-free, gluten-free, and plant-based. Summer Cake for 6 people Ingredients For the cake: 4.7 dl gluten-free oat flour 1.2 dl brown rice flour 1.2 dl coconut flour 3 dl coconut sugar 1 tbsp baking powder 2.4 dl unsweetened applesauce 1.6 dl unsweetened almond milk or coconut milk 4 tbsp melted coconut oil 1 tbsp alcohol-free vanilla extract 2 tbsp ground flaxseeds For the coconut cream: The thick cream from 3 CHILLED (8h) cans of coconut cream (not the liquid in the can) 3-4 tbsp maple syrup (add more to taste) 0.8 dl natural sprinkles, crushed nuts, or make a strawberry cake with the ingredients below If you want to make a strawberry cake, add: 1 1/2 liters fresh strawberries1 tbsp coconut sugar Instructions: NOTE! Chill your 3 cans of coconut milk for at least 8 hours Preheat the oven to 180°C. Line two 23 cm (diameter) cake pans with parchment paper Whisk together oat flour, brown rice flour, coconut flour, coconut sugar, and baking powder in a large bowl. In another bowl, mix applesauce, milk, coconut oil, and flaxseeds. Whisk until the batter is smooth. Add the wet ingredients to the dry and stir until you get a very thick but pourable batter. Then divide the batter in two and fill the cake pans. Bake in the middle of the oven for 23-26 minutes until the cakes are golden brown. Test with a toothpick. IF MAKING STRAWBERRY CAKE: Slice 1/2 liter of strawberries for garnish. Mash 1 liter of strawberries and mix in 1 tbsp coconut sugar. Let sit for 30 minutes. Remove the cakes and let them sit for 5 minutes outside the oven, then remove the cake pans and let the cakes cool on a wire rack. Proceed to the topping. Whip the cold coconut cream with maple syrup until fluffy using an electric mixer or similar. To assemble the cake, place one cake layer on a serving plate. Spread a layer of whipped coconut cream on top. If making a strawberry cake, spread the mashed strawberries here. Place the second cake layer on top and spread coconut cream over the entire top and sides. Put some coconut cream in a piping bag and make small neat peaks on the cake. Then sprinkle your sprinkles over the cake or add your fresh strawberries! If you prefer to make the cake in several layers with, for example, a coconut cream layer and a strawberry layer, be very careful when cutting the cakes as they can break. But with a little finesse, everything works! Keep the cake chilled until ready to enjoy!
Read more
Vegan & gluten-free Easter eggs with chocolate crunch
Impress your guests with wonderfully delicious chocolate eggs that everyone can enjoy! Basic Chocolate Recipe – about 12 pieces 1 dl cocoa butter1/4 dl coconut oil5 tbsp cocoa powder2 tbsp yacon syrup or maple syrup1 tbsp lucuma1 pinch vanilla powder1 pinch natural salt How to make it? Melt the cocoa butter in a water bath, stirring constantly, add the coconut oil and stir until combined. Remove from heat. Mix with the other ingredients in a bowl and stir thoroughly all the time. Pour a little of the chocolate mixture into the bottom of a mold, for example a silicone mold shaped like eggs. Then add the crunch and finally fill with chocolate mixture on top. Let set in the refrigerator. If not eaten immediately, store best in the refrigerator. Crunch for the chocolate – about 12 pieces 1 dl coconut palm sugar1 tsp yacon syrup or maple syrup1 dl whole buckwheat, soaked overnight and then dried.Zest (grated peel) from 1 organic lemon2 tsp grated fresh ginger1 pinch natural sea salt How to make it? Melt the coconut sugar together with the syrup or honey in a frying pan over low heat. Pour into a bowl. Stir in the other ingredients thoroughly and pour the mixture onto baking paper. Let cool until it hardens, then chop into small pieces. Drying buckwheat For raw food drying, you can dry buckwheat in a dehydrator overnight, in a regular oven for 6 hours at 45 degrees Celsius, or spread out on a tray during the day. Quick drying in a regular oven takes 20 minutes at 175 degrees Celsius. If you don’t want crunch and want to vary, you can add other ingredients to the basic chocolate recipe such as spirulina, chaga mushroom, goji berries, bee pollen, maca, cacao nibs, chili, licorice, peppermint, acai, blueberries, etc… let your imagination flow!
Read more
5 healthy and natural ice cream recipes for homemade ice cream
Here we share five delicious and healthy ice cream recipes that you can use to make ice cream sticks with ice cream molds from Pulito. Omit the agave, honey, or sugar for a less sweet option and adjust to taste by using less. Choose organic ingredients! 1. Banana Ice Cream Use ripe organic bananas. 1. Mash the bananas into a smooth mixture. 2. Fill the containers and freeze the ice cream. 3. Enjoy! 2. Watermelon Ice Cream Use organic watermelon, organic honey, and optionally organic mint. 1. Blend the watermelon in a blender/mixer and add as much honey and mint as you like – or skip entirely. Taste as you go! 2. Fill the containers and freeze the ice cream. 3. Enjoy! 3. Strawberry Ice Cream Use frozen organic banana (freeze the banana without the peel to make it easier), frozen organic strawberries, organic honey (or other sweetener), organic vanilla powder, and organic milk of your choice. 1. Slice the banana and freeze it. 2. Then put it in a blender/mixer together with the frozen strawberries. 3. Pour in milk or another liquid and blend. Also add honey (or other sweetener) for sweetness, and a little vanilla powder. 4. Fill the containers and freeze the ice cream. 5. Enjoy! 4. Chocolate Ice Cream Use frozen organic banana (freeze the banana without the peel to make it easier), organic cocoa, organic milk of your choice, organic liquid honey, and organic cocoa nibs. 1. Slice the banana and put it in a blender/mixer. 2. Add cocoa, milk or another liquid, and a little honey for sweetness. 3. Fill the containers and freeze the ice cream. 4. Take out the ice cream and dip it in melted organic chocolate, then dip the top in cocoa nibs. 5. Piña Colada Ice Cream Use 400g fresh or canned pineapple, 1.5 dl (160g) coconut milk or coconut cream, honey for sweetening, and 1 lime. Blend the pineapple with the coconut milk/cream. Add the amount of honey and lime you want (taste as you go) and blend. 2. Fill the containers and freeze the ice cream. 3. Enjoy!
Read more
8 health benefits of nettles - for health, skin, and hair
Stinging nettle (Urtica dioica) is a fantastic, nutrient-rich plant packed with chlorophyll, vitamin C, B1, B2, B6, folate, iron, calcium, potassium, magnesium, zinc, silica, histamine, acetylcholine, formic acid, serotonin, pantothenic acid, and sulfur. And you can pick it for free in our nature! When to pick nettles You can pick nettles throughout spring, summer, and part of autumn. Use gloves! Take the youngest leaves at the top and skip the stems. Early spring, the stinging nettles have young tender shoots perfect for food and tea. But nettles can also be harvested later in the season. To get equally tender shoots as in spring, cut down the older plants, and new shoots will soon sprout. Avoid picking nettles near manure heaps as they may contain too high levels of nitrates. Nettles intended for nettle water can be harvested any time of the year. 8 health benefits of nettles Provides steady energy in the body and is generally strengthening, making it good for exhaustion. Supports the kidneys. Diuretic effect. Supports all glands and organs. Helps with stomach gas. Helps with dry mucous membranes. Helps with skin problems. Gives radiance to skin and hair. Here you can find nettle as an herbal supplement. Nettle in cooking Nettles are not used fresh in cooking but blanched or dried. Blanch for 2–3 minutes. This is done to remove nitrates. Strain off the water. Use the blanched nettles directly in cooking or freeze them. You can dry the leaves, crumble them, and use them for tea, smoothies, yogurt, or muesli. You can also make a powder. Dried nettles should be stored in a dark, cool place in a glass jar. Or you can use the blanched leaves in cooking; in soups, sauces, gratins, omelets, pies, pesto, frittata, risotto, etc. Fresh nettles have a short shelf life and should be eaten immediately or dried for storage. Nettle pesto Pick the leaves from the stems and rinse them. Boil the nettles for a couple of minutes in salted water. Then rinse them in cold water and dry a little. Blend the nettles together with pine nuts or almonds, garlic, parmesan, and olive oil. Season with salt and pepper. Make a nettle infusion When dried nettle is steeped in water for a long time, it becomes very mineral-rich. Here’s how to extract the minerals: 15 grams of dried stinging nettle to 1/2 liter of freshly boiled water. Let the dried leaves steep in freshly boiled water, covered, in a pot for at least 4 hours (heat off). It’s fine to let it stand longer, overnight. Strain and store in a glass jug in the refrigerator. You can drink 2-4 cups a day or use it as a base in a smoothie. Remember to also drink water as nettle makes you thirsty. This is an excellent way to get minerals, especially magnesium. You can find dried stinging nettle here. Nettle in skincare DIY / Nettle shower gel: 2.5 dl nettle infusion (recipe above)0.5 dl liquid Castile soap2 tbsp castor oil20 drops essential oil Nettle in hair care Nettles are said to help against hair loss and make hair soft and shiny. They are also said to counteract dandruff. Several of the natural hair products we offer contain nettle. Nettle water for gardening Nettle water is something most gardeners know about. You put nettles in a barrel, fill it with water, and let it stand for a week or more. You need a lid because it smells unpleasant. The water fertilizes, strengthens the plants, and gives them more resistance. A fun legend In the Middle Ages, it was believed that nettles marked the place where fairies lived. Nettles were also a protection against black magic since trolls and witches could not spoil the milk where nettles grew. In folk medicine, nettles have been used against scurvy, tuberculosis, cough, and hair loss (which it is still used for). Nettle decoction was formerly used as an antidote against various poisonings such as mushroom poisoning, snake bites, and if someone had eaten poisonous berries.
Read more
Food dehydrator for better health and savings - 6 benefits
A good food dehydrator can give you both better health and better finances. Here we list six reasons to make food drying a habit in the kitchen! A modern food dehydrator is designed to dry all kinds of foods: fruit, berries, vegetables, mushrooms, herbs, flowers, and fish for those who want. They are easy to use and inexpensive to operate. Only your imagination limits what you can dry and preserve in a way that retains both nutrition and flavor in seasonal goods. In late summer, it can be a good time to dry blueberries and mushrooms you find in the forest. Below are some simple tips and recipes for that! 1. Drying offers new taste experiences If you use a food dehydrator to dry foods like fruit, vegetables, and berries, a naturally concentrated flavor is created that can be used for tasty snacks, as a side dish, or as an extra seasoning in stews, on porridge, in desserts, and other recipes. Simple fruits can be transformed into healthy candy. Vegetables can become tasty chips, burgers, raw food pizza, homemade herb or soup blends with herbs and garlic. The possibilities are endless. 2. Drying food reduces food waste and extends shelf life Never waste food again. If you dry leftover fruit and vegetables in a food dehydrator, you can extend their shelf life up to 2 years. This is perfect if, for example, you harvest food from your own garden or the forest when it’s in season. Or why not buy larger batches at the grocery store when it’s in season and stock your pantry with summer’s or autumn’s ingredients in dried form? It’s both cheaper and more fun than buying pre-dried food in the store. Dried food can also be “rehydrated” with water or added directly to soups, stews, or pasta sauces. 3. Healthy and 100% natural foods Drying food requires only one ingredient; the food you are drying. This way you can be sure of what you and your family are eating without having to scrutinize ingredient lists or worry about hidden additives (e.g., sugar, citric acid, and sulfur dioxide are common additives in dried fruit). 4. Better finances Pre-packaged snacks can be expensive, and organic dried food as well. You can save a lot of money by drying your own food. Feel free to buy fresh foods in bulk when they are in season or harvest your own ingredients and dry them for later storage. 5. Efficient storage Dried foods take up less than one-sixth of their original storage space and don’t consume electricity like a fridge or freezer. Just pack the food in clean, dry containers and store them in your pantry. Reduction in size and weight means dried food is especially perfect for camping, hiking, or emergency supplies. 6. Best results with a good dehydrator A good dehydrator is both safe and incredibly easy to use. Key components for successful drying are even temperature and good airflow around the food. Unlike other preservation and drying methods, the risk of bacterial growth is very low. With a dehydrator, you just need to place appropriately sized pieces on the trays, set the timer, and "forget" the food until it’s done and the dehydrator turns off by itself. Could it be any easier? How to dry blueberries and mushrooms this fall There are plenty of blueberries and mushrooms in our Nordic forests. Pick a large amount and dry them for autumn and winter. Here are some simple tips on how to dry blueberries (or any other berries) and mushrooms for the best results. Tips for drying blueberries and other berries in a dehydrator Blueberries are one of our Nordic "superberries" packed with nutrition and health-promoting properties. Wild berries are said to be especially nutritious and full of vitality that we want to preserve and enjoy year-round. Blueberries have very high antioxidant levels. The main antioxidant compounds in blueberries belong to a family of polyphenols called flavonoids. Polyphenols are said to help counter harmful gut bacteria and reduce the risk of inflammation. Blueberries also contain anthocyanins and carotenoids; anthocyanins give blueberries their blue color. They also contain a lot of vitamins and minerals. The easiest way: Dried whole berries or berry powder. Spread fresh berries on the drying trays and dry at around 40°C for about 12 hours or until completely dry. If you want to make a powder from them, you can now process the dried berries in a food processor to the desired size. Store in a dry place protected from light for up to two years. Then use in smoothies, baked goods, porridge, etc. Blueberry candy: Make delicious strips with different flavors To make fruit & berry strips, simply blend blueberries with your choice of other fruits, herbs, or spices into a batter, which you then spread out and dry. Very simple and very tasty! Two different flavors of blueberry strips*: Blueberry/Licorice strips 6 dl blueberries 1.5 tbsp liquid honey or liquid coconut sugar 2 tsp licorice root powder 1 pinch natural salt (or more to taste) Blueberry/Vanilla strips 4 dl blueberries 1 banana 10 pitted dates 1 tsp real vanilla powder Instructions: Blend all ingredients into a batter. Spread evenly and thinly on a silicone mat or baking paper on a drying tray (or several). Dry for 6-8 hours at 40°C. Take out the trays, place an empty tray on top of the mixture, and flip everything over, then carefully peel off the silicone mat or baking paper. The point here is to place the entire mixture, which hopefully has now hardened into a "sheet," onto a drying tray without paper or mat. Dry again for 6-8 hours at 40°C until you get a really chewy texture and they are dry on the surface. Take out of the oven, cut into narrow strips, and roll into rolls. Store in a dry and cool place. *****You can easily make raspberry, mango, or strawberry strips with the same base recipe – just replace the blueberries with whatever you want and do the same. How to dry mushrooms in a drying oven Almost all edible mushrooms are well suited for drying. They develop a concentrated and fine mushroom flavor that is perfect for enhancing the taste in all kinds of recipes, and they keep very well if stored dry. This is important to keep in mind when drying mushrooms Only dry whole and clean mushrooms – that is, remove mushrooms that look old or damaged. Cut larger mushrooms into slices about 0.5 cm thick. Spread out on drying trays without drying cloth for the best airflow. Dry at around 50°C for 8-10 hours – this applies to most mushroom varieties. Preferably store in an airtight glass jar if they are to be kept for a long time. Note: it is important that the mushrooms are completely dry before you pack them. Here you can read more about our drying ovens. We are also happy to answer any questions about them, so don’t hesitate to get in touch! Here you can buy ready-made blueberry powder if you want to make it easy for yourself. 😉 About our ready-made blueberry powders: Holistics' blueberry powder comes from the Nordic region and is wild blueberries of the species Vaccinium myrtillus. The most common variety. Vimergy's blueberry powder is a different type of blueberry, so-called "lowbush" blueberries of the species Vaccinium angustifolium, wild-harvested in Canada. They are rarer and also more expensive.
Read more
Ferment and pickle vegetables at home - Simple recipes
In the past, fermentation was a natural preservation process that made food last longer. Additionally, it gave us a healthier gut thanks to the beneficial probiotic bacteria found in fermented foods. You can ferment both vegetables and drinks. In this article, I share my three favorite recipes, and if you want more recipes and guides for fermentation, you can read more on my blog Morotsliv.se. It’s incredibly easy to ferment and pickle vegetables in glass jars. Especially the jars from Weck. They are made of soda-lime glass that can be both dishwasher safe and freezer safe. Weck preserving jars have a wide opening, making them easy to fill, empty, and clean. The glass lid and natural rubber seal make it easy to check the seal after preserving. Preserving is easier than you think, it’s fun, satisfying, and you save money by doing it yourself. Make sure hands, tools, and jars are well cleaned before you start. Here are my three favorite recipes: Fermented Sauerkraut Quick-pickled carrots Pickled Onion Fermented sauerkraut The easiest thing you can ferment is white cabbage, which naturally contains starter culture and is hard to fail with. Once you’ve learned the process, you can try adding carrot, red cabbage, lingonberries, cauliflower, spices like fennel, and so on. The more batches you make, the more you can vary the ingredients as you get comfortable with the process. Ingredients 1 white cabbage head 1 tbsp sea salt without additives You need 1 Weck Jar preserving jar 850 ml Cutting board Knife Instructions Remove the outer leaves if needed. A cabbage head usually does not need to be rinsed. Cut and shred the head. Remove the hard "core" and grate it finely. The core is rich in minerals and provides a more stable fermentation. Mix the white cabbage with a little salt at a time (about one tablespoon per cabbage head). Knead and press it until a lot of liquid has formed and the cabbage has softened. Fill a glass jar with the cabbage and liquid, pressing the cabbage down firmly with your fist so that the liquid covers the cabbage. Tighten the jar lid so that no air can enter, which would spoil the fermentation. Let the glass jar stand at room temperature for 3 days and then in a cool place at about 15-18°C for 3 weeks. Let it stand for another month in the fridge, then you can divide the sauerkraut into smaller jars if you want. The cabbage keeps for about 1.5 years if you keep it sealed in the original jar. If you open the jar and divide the finished sauerkraut into smaller jars, it keeps for about 4 months instead. If you want, you can flavor the sauerkraut with caraway, juniper berries, lingonberries, onion, red cabbage, carrot, or apple, but it’s just as good without. Tip! Always trust your sense of smell if anything in the process deviates from the plan. Quick-pickled carrots Ingredients 4-5 large carrots 1 tbsp sea salt without additives 1 liter water You need 1 Weck Jar preserving jar 850 ml Grater Saucepan Cutting board 1-liter measure Instructions Boil 1 liter of water and dissolve 1 tablespoon of salt in the water. Let cool to room temperature (max 35 degrees) Peel and coarsely grate the carrots. Pack/press the carrots into the glass jar. Pour the saltwater so the carrots are covered. Press down the carrots and tap the jar to remove any air bubbles. Tighten the lid so no air can get in. Let the jar stand at room temperature for 3 days. Smell the carrots. They should smell tangy and fresh. Place the carrots in the fridge for a couple of days. Taste the carrots. They should have a tangy flavor reminiscent of sauerkraut. The fermented carrots keep in the fridge for several months. Pickled red onion This is so delicious and a recipe with less sugar than traditional ones. You can also replace the sugar with xylitol or another natural sweetener, or skip it entirely. Ingredients 3-4 red onions 1 dl vinegar spirit 1 dl organic sugar 3 dl lukewarm water You need 1 Weck Jar preserving jar 850 ml Food processor or knife Cutting board Measure 0.5 liters Saucepan Instructions Peel the red onion. Slice the red onion thinly with a knife or in a food processor. Put it in a well-cleaned preserving jar. Mix vinegar, sugar, and lukewarm water. Stir until all the sugar has dissolved. Pour the brine over the onions. Place in the fridge until the next day. The onion tastes best within a week, but it keeps for up to a month in the fridge. Are you an expert in pickling or fermenting and have great tips and tricks for the rest of us? Feel free to share in a comment or ask a question!
Read more
Warming winter smoothies with superfoods & goji berry tea
Here we offer some recipes for delightful smoothies and tea to recharge your batteries this winter. These recipes are “basic themes” that you can vary according to your preferences. You can always swap out some of the superfoods or spices for those you like or have at home. Warm Super Smoothie This is a wonderful way to get extra nutrition and spices through a warming drink. Ingredients 1 tbsp chia seeds 1-2 tbsp of any superfood you like. For example, you can choose Maca, Cacao, Acai, or Schisandra. 1-2 tsp warming spices such as cinnamon, vanilla, turmeric, or cardamom. 1 organic banana or a handful of pitted dates for sweetness 2.5 dl oat or almond milk Bee pollen for garnish Instructions Put the milk, chia seeds, powder, spices, banana or dates into a blender and blend quickly. Gently warm the drink to about 40-50°C. Pour into a glass and garnish with bee pollen. Green Winter Smoothie A green smoothie with warming properties that is perfect for the winter season. Ingredients 1 cored apple 1/2 organic banana 1 small handful of kale or spinach 1 piece of fresh, peeled ginger 1 tsp dried turmeric A pinch of chili Juice from 1/2 lemon About 2 dl filtered water – use room temperature or slightly warmed water to enhance the warming effect. Optional additions: 1 tsp Baobab 1 tsp MCT oil or Coconut oil 1 tsp Spirulina 1 tsp wheatgrass powder Instructions Blend all ingredients into a smoothie. Detox Winter Smoothie A smoothie with cleansing properties that is also suitable for the winter season. Ingredients 2 dl wild or organic blueberries, frozen, fresh, or powdered. 1 ripe organic banana 2-3 pitted dates 1 stalk of organic celery, chopped Fresh coriander – as much as you like A large handful of baby spinach leaves 1 small piece of ginger Some pieces of dulse seaweed Water – add as much water as needed to achieve your desired smoothie consistency. Optional additions: 1 tsp fiber such as Prebivtalis pro1 tsp AFA algae1 tsp wheatgrass powder Instructions Blend all ingredients into a smoothie. Goji Berry Tea A tip we want to remind you of is how beneficial and tasty goji berry tea is. Ingredients Dried organic goji berries Hot water (70-100 degrees depending on preference) Instructions Rinse the goji berries in cold water (about 1/2 dl goji berries to 7 dl water). Place them in a heatproof container with a lid – for example, a teapot or a teacup – and pour in hot water. Cover with the lid and let them steep for 1 hour. Then just enjoy. Light and beneficial. We hope you enjoy the recipes and wish you a relaxed and cozy winter.
Read more